
This is my favorite yeast dough recipe because it is straight-forward and very versatile. I use it for Italian bread, rolls, pizza, stromboli and calzones. If I'm using the recipe for one of the pizza type recipes I cut the measurements in half and only let it rise once. I make the dough in my KitchenAid mixer but you can do it in a large food processor and , heaven forbid, by hand. I use all purpose unbleached flour but you can also use bread flour or substitute half the white flour for wheat. I suggest you begin with the original recipe and save the experiments for later.
This recipe is basic and easy but it is not quick. Good bread-making takes time. The mixer eliminates most of the strenuous, back-breaking work but you can't rush the rising process.

A few tips help assure a perfect product:
Make sure liquids are luke-warm at about 90*.
Be sure to use a glass container for proofing the yeast.
Be careful not to deflate the bread after the final rise.
Let the dough rise away from drafts.
Make sure the oven has been pre-heated for and additional 10 minutes before baking.
Have a good book or a DVD to watch in between risings.

Ingredients:
2 packages active dry yeast
7.5 cups flour
3 cups room temperature water
1 tablespoon salt
1 teaspoon sugar
2 tablespoons good olive oil
1/4 cup corn meal or bread crumbs
Method:
In a small glass bowl or measuring cup add 1/2 cup warm water and the sugar. Sprinkle the yeast over the sugar-water and set aside for 5 minutes or until you see bubbles form.
In the mixer bowl combine flour and salt and mix with a whisk briefly to combine. Place the bowl on the mixer and install the dough hook.

Now add the oil, 2 cups of the water and the yeast mixture. Lower the hook into the bowl and start on lowest setting to combine ingredients and then raise the speed to medium for 5 minutes. Turn off the mixer and walk away for 10 minutes for the dough to rest.
After the dough has rested and you have finished your cup of coffee, restart the mixer and allow to knead at medium to medium high speed for a full 15 minutes. Make sure you have the mixer on the back of your counter and keep an eye on it so it doesn't dance off and onto the floor. If the dough seems much too stiff you can add up to another half cup of water but add slowly and only as needed.

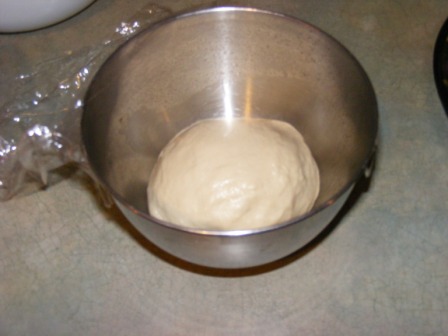
While the dough is kneading, lightly flower a bread board or clean dry counter surface with 1/4 cup flower. After the kneading, turn off your mixer and turn the dough out onto the floured surface. Knead by hand for about 10 turns of the dough. Form the dough into a ball. Lightly oil the mixing bowl and return the dough to the bowl and cover the bowl with plastic wrap and a towel. Set the dough in a warm place. The oven works fine so long as it is not turned on! Now the dough must rise for about 1.5 hours to what is called "doubled in bulk" stage.
Uncover the dough and press your fist right down into the middle of the risen dough and press the air out. Re-shape the dough into a ball, cover and set it back to rise again for about 1 hour this time..
During this rising time prepare a baking sheet by sprinkling with a thin layer of the corn meal.
After the second rising, turn the dough back out onto the floured surface. Divide the dough in half and form each half into a ball and place each on the baking sheet a few inches apart. Loosely cover with a damp cloth by draping the cloth of 4 large drinking glasses to keep it off the dough.
Allow to rise again for another 1 to 1.5 hours until doubled.
Preheat the oven to 375*
When the dough has finished the final rise, carefully remove the cloth and the glasses. Do not touch the risen dough! This is very important. Place the baking sheet in the middle of the preheated oven. Bake for 40 minutes or until nicely browned.
Remove the pan from the oven and allow the breads to cool.


I love, love your graphics on the foodie page as well as the music, I consider you one of the chocolate chips in the cookie that is my life.
ReplyDeleteI cannot wait to try this thank you so much.love Tricia
ReplyDelete