Showing posts with label baking. Show all posts

Friday, January 21, 2011

FOODIE FRIDAY RECIPE - PIZZA

PIZZA!
The word alone makes most people smile.  That perfect combination of home made bread, tomato, cheese opens the door to an endless variety of personalization choices.  For me, the basic combination is all I need but once in a while I splurge with some fresh asparagus or leftover meatballs or shrimp.  

There are few aromas that can compete with that of pizza baking in your oven.  The rich cheeses, the aromatic basil and the slight acidity of the tomato all get your memories flowing and your mouth watering.

I am going to give you the basics, including the dough recipe.  I promise not to frown if you choose to use a fresh pizza dough from your grocer's refrigerator or from your local bakery.  They are fairly readily available and perfectly acceptable.  Please do not used one of those pre-formed packaged pizza / focaccia shells sitting on the shelf next to the white bread.


I do not usually advocate single-use or specialty gadgets but one item that I suggest you add to your collection of  baking sheets and pans is an aluminum pizza screen.  They are reasonably priced and help produce a wonderfully crisp crust.


Ingredients:

[for the dough]

1 package active dry yeast
1.5 cups room temperature water
3.5 cups all purpose or bread flour
1 tablespoon salt
1 tablespoon olive oil


[for the topping]

2 cups shredded cheese [I like the mozzarella/provolone mix]
1/3 cup grated Romano or Parmesan cheese
6-10 fresh basil leaves
2 teaspoons dried oregano
1 teaspoon salt
1/2 teaspoon ground black pepper
1 tablespoon olive oil
1 cup tomato puree
1 small clove garlic, minced


Method:
[for the dough]
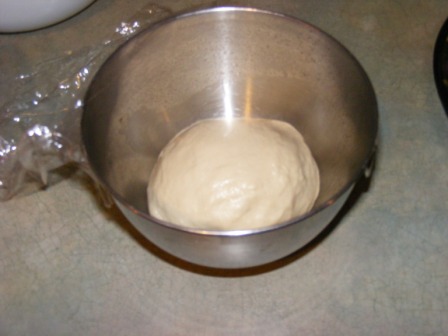
Combine the dry ingredients in the bowl of your stand mixer or in a large bowl if you are going to kneed by hand.  Stir to mix well.  Add the oil and all but 2 tablespoons of the water. Mix with the dough hook for 5 minutes. If the dough seems dry then add the rest of the water. Let rest for 5 minutes and kneed for another 10 minutes.  Transfer the dough to an oiled bowl, cover with plastic wrap and let rise for an hour.

[for the sauce]
For pizza it is best to use a raw "sauce".  Please don't use a pre-made sauce!  Blend the tomato puree, garlic, oregano, salt and pepper.  

Assemblage:

When the dough has risen for an hour, turn it out onto a floured surface.  I like to use a silpat mat for this but you can work directly on your counter top.  

Preheat oven to 425*

Rub some flour on your hands and begin to stretch the dough with your hands.  At this point you can cheat and use a floured rolling pin to flatten and continue to stretch the dough until it is quite thin but not torn.  This dough generally makes a 16" crust.  Feel free to leave the dough in a free-form shape if you are unable to get it into the traditional round.  I like the rustic look and then you can be sure your guests will know it is handmade!


Place the dough on the pizza screen or baking sheet and very lightly cover with the sauce.  The sauce should barely cover as illustrated in the photo above.  If you use more sauce than that the pizza will be soggy.

Sprinkle the grated Romano over the sauce. Now arrange the fresh basil leaves over the pie.  Cover with the shredded cheeses and sprinkle with the remaining olive oil.  


Bake on middle rack for 20 minutes or until golden and bubbly.


Serve piping hot from the oven.  You can also cut into bite-sized pieces and serve as an hors d'oeuvre.

Friday, October 29, 2010

FOODIE FRIDAY RECIPE - ITALIAN BREAD


This is my favorite yeast dough recipe because it is straight-forward and very versatile.  I use it for Italian bread, rolls, pizza, stromboli and calzones.  If I'm using the recipe for one of the pizza type recipes I cut the measurements in half and only let it rise once.  I make the dough in my KitchenAid mixer but you can do it in a large food processor and , heaven forbid, by hand.  I use all purpose unbleached flour but you can also use bread flour or substitute half the white flour for wheat.  I suggest you begin with the original recipe and save the experiments for later.  

This recipe is basic and easy but it is not quick.  Good bread-making takes time.  The mixer eliminates most of the strenuous, back-breaking work but you can't rush the rising process.  


A few tips help assure a perfect product:
Make sure liquids are luke-warm at about 90*.
Be sure to use a glass container for proofing the yeast.
Be careful not to deflate the bread after the final rise.
Let the dough rise away from drafts.
Make sure the oven has been pre-heated for and additional 10 minutes before baking.
Have a good book or a DVD to watch in between risings.


Ingredients:
2 packages active dry yeast
7.5 cups flour
3 cups room temperature water
1 tablespoon salt
1 teaspoon sugar
2 tablespoons good olive oil
1/4 cup corn meal or bread crumbs

Method:
In a small glass bowl or measuring cup add 1/2 cup warm water and the sugar.  Sprinkle the yeast over the sugar-water and set aside for 5 minutes or until you see bubbles form.

In the mixer bowl combine flour and salt and mix with a whisk briefly to combine.  Place the bowl on the mixer and install the dough hook.


 Now add the oil, 2 cups of the water and the yeast mixture.  Lower the hook into the bowl and start on lowest setting to combine ingredients and then raise the speed to medium for 5 minutes.  Turn off the mixer and walk away for 10 minutes for the dough to rest.

After the dough has rested and you have finished your cup of coffee, restart the mixer and allow to knead at medium to medium high speed for a full 15 minutes.  Make sure you have the mixer on the back of your counter and keep an eye on it so it doesn't dance off and onto the floor.  If the dough seems much too stiff you can add up to another half cup of water but add slowly and only as needed.


While the dough is kneading, lightly flower a bread board or clean dry counter surface with 1/4 cup flower.  After the kneading, turn off your mixer and turn the dough out onto the floured surface.  Knead by hand for about 10 turns of the dough. Form the dough into a ball.  Lightly oil the mixing bowl and return the dough to the bowl and cover the bowl with plastic wrap and a towel.  Set the dough in a warm place.  The oven works fine so long as it is not turned on!  Now the dough must rise for about 1.5 hours to what is called "doubled in bulk" stage.


Uncover the dough and press your fist right down into the middle of the risen dough and press the air out.  Re-shape the dough into a ball, cover and set it back to rise again for about 1 hour this time..  

During this rising time prepare a baking sheet by sprinkling with a thin layer of the corn meal.

After the second rising, turn the dough back out onto the floured surface.  Divide the dough in half and form each half into a ball and place each on the baking sheet a few inches apart. Loosely cover with a damp cloth by draping the cloth of 4 large drinking glasses to keep it off the dough.

Allow to rise again for another 1 to 1.5 hours until doubled.  

Preheat the oven to 375*

When the dough has finished the final rise, carefully remove the cloth and the glasses.  Do not touch the risen dough!  This is very important.  Place the baking sheet in the middle of the preheated oven.  Bake for 40 minutes or until nicely browned.  

Remove the pan from the oven and allow the breads to cool.